Light Projects
A collection LED control examples for Arduino
Low-voltage DC Lamps
LED Drivers
LED Strip Control
Addressable LEDs
NeoPixel Library Quickstart
Making Electronic Candles
Fading
Chromaticity
Color Spaces
Spectrometers
Light Rendering Indices
Inventory
Pattern Making
Telephone Dimmer for Philips Hue
Tom's other light-related repos
tigoe.github.io
This project is maintained by tigoe
Sky Lights
For a long time I’ve wanted to make indoor lights change with the light from the sky outside. Today, I had a free hour, so I built a test of it.
I started with a Philips Hue system we have installed at ITP, and a couple of Arduino Nano 33 IoT modules. Nun and Name installed a few of the Hue lightstrips as an arch to welcome people to the floor, as shown in Figure 1. I decided that if I could get the arch to reflect the color temperature from the eastern and western sides of the building, that would be a decent test.
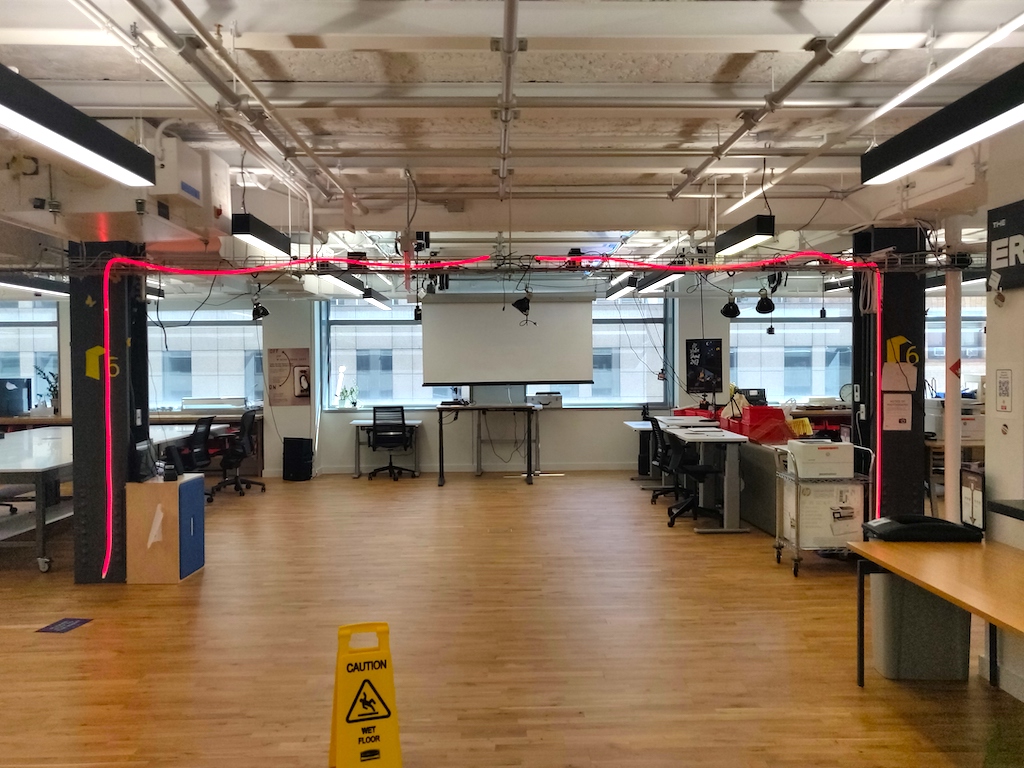
Figure 1. Archway of light in the entrance of ITP’s 370 Jay St space.
I have a few TCS34725 light sensor boards from Adafruit, which I attached to two Nano 33 IoT boards to use as my networked light sensors. Figure 2 shows one on the southeast corner of the floor, late morning, and Figure 3 shows the one on the southwest corner of the floor, same time.
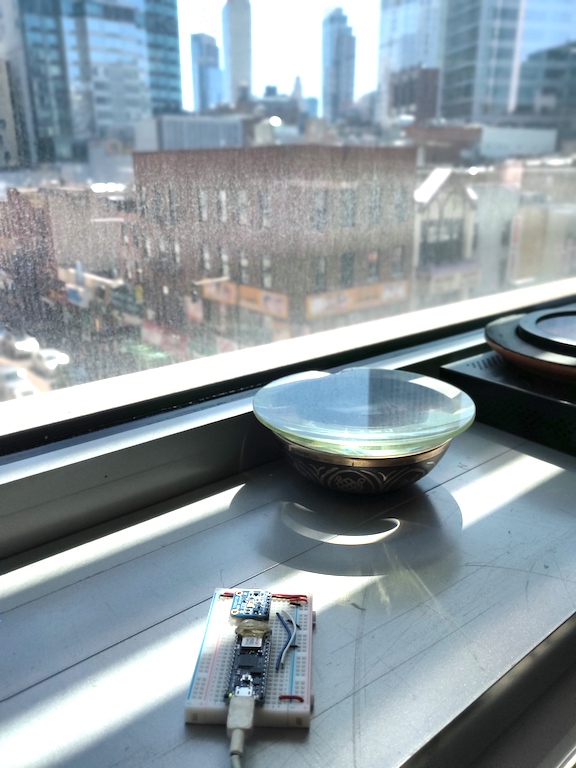
Figure 2. Nano 33 IoT and light sensor in a southeast window. In the morning, this sensor will be hit with direct sunlight, but for most of the day, it will be in indirect sunlight.
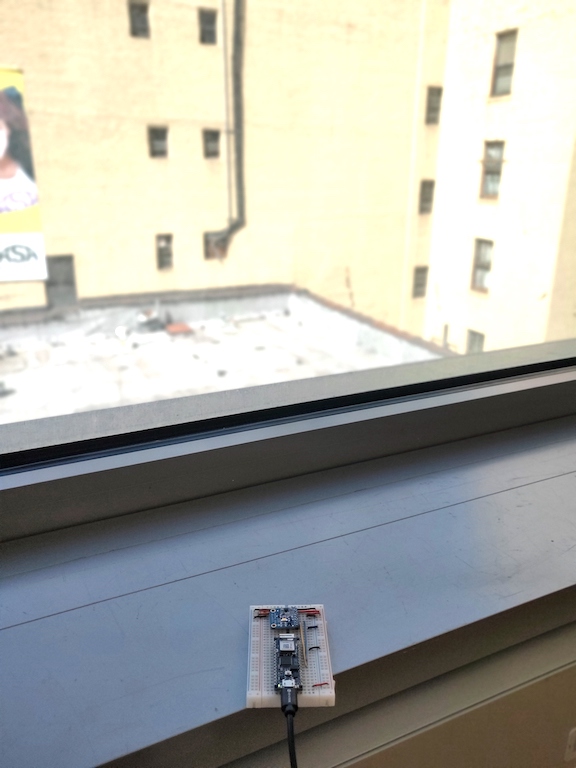
Figure 3. Nano 33 IoT and light sensor in a southwest window. In the afternoon, this sensor will be hit with direct sunlight, but for most of the day, it will be in indirect sunlight. The reflection off the pale yellow wall next door will probably lower the color temperature a little.
The Circuit
The circuit is fairly simple. The sensors draw their power from the Arduino’s voltage, and the I2C pins of the sensor are connected to the I2C pins of the Arduino. The sensor’s LED pin is wired to ground, because there is a built-in LED which will turn on otherwise. Figure 4 shows the breadboard layout, and Figure 5 shows the schematic.
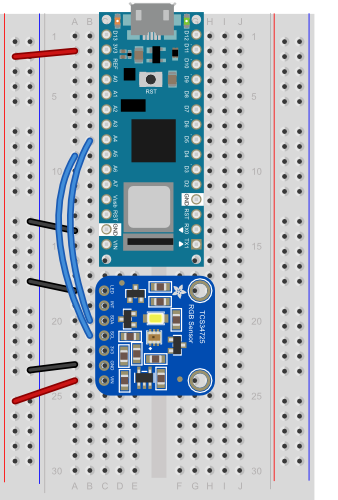
Figure 4. Nano 33 IoT and light sensor, breadboard view.
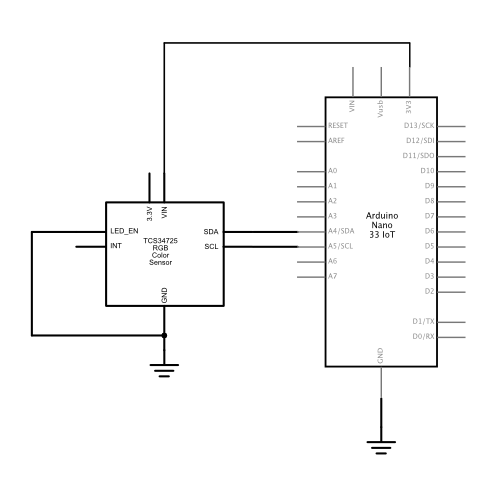
Figure 4. Nano 33 IoT and light sensor, breadboard view.
The Code
I started my code using the HueBlink example from the ArduinoHTTPClient library. I also referred to the Philips’ documentation of the Hue API. Knowing from the Hue documentation that the API uses JSON, I incorporated the Arduino_JSON library to simplify the data formatting. I also used Adafruit’s TCS34725 library for the sensor.
The pseudocode for my program is as follows:
setup:
- Initialize the sensor
- Make the WiFi connection
Loop:
- If a minute has passed, and you’re not in the middle of a request,
- Read the sensor
- Make a HTTP Request to the Hue hub
- If you are in the middle of a request, wait for a reply
- Print the reply
Sensor reading:
- Get the raw values
- Convert to illuminance (lux) and color temperature (degrees Kelvin)
- Convert illuminance to a 0-254 range for the Hue
- Convert color temperature to the Mired scale for the Hue
The HTTP Request
The HTTP Request to the Hue hub to change a light looks like this:
http://hue.hub.address/api/hueUserName/lights/lightNumber/state
You need to [establish a hub user name for your device]ªhttps://github.com/tigoe/hue-control#connecting-to-your-hub first, and you need to know which light you are controlling and what properties it has. For more on that, see the Hue developers site or these notes.
The body of the PUT request looks like this:
  {"on": true,
  "bri": brightness,
  "ct": value,
  "transitiontime": fadeTime
  }
onis true or falsebriranges from 0 - 254ctis in the mired scale, which is 1000000/degrees Kelvin. It ranges from 153 - 500transitiontimeis in increments of 100ms
There are other properties, depending on the type of Hue light you are using, but these are the important ones for this project.
There are two important details to the HTTP request to the Hue hub: it has to be a PUT request, and the Content-Type has to be application/json. To make this easy, my sketch takes the sensor readings and puts them in a JSON object like so:
 body["bri"] = bri;
  body["on"] = true;
  body["ct"] = mired;
  body["transitiontime"] = sendInterval / 100;
When it makes the request, it does it like so:
    // print latest reading, for reference:
      Serial.println(JSON.stringify(body));
      // make a String for the HTTP route:
      String route = "/api/" + hueUserName;
      route += "/lights/";
      route += lightNumber;
      route += "/state/";

      // make a PUT request:
      httpClient.put(route, contentType, JSON.stringify(body));
Those are the important parts of the communication.
That’s basically it. The full sketch can be found here. The biggest challenge was the compression of the light levels (brightness or illuminance), because the illuminance levels can go from below 20 in a dim space to over 35000 lux in full sunlight. The Hue has a 0-254 range for brightness. I derived my range by experimetation. I found that it went to about 2000 lux in indirect sunlight, so I constrained my result to 2000 points, mapped it to a 0-254 range to get a reading the Hue could accept. It’s crude, but we’ll see how it does over time.