DMX Examples
A collection DMX-512 control examples
tigoe.github.io
DMX_Examples Home
DMX/sACN Intro
TouchDesigner DMX settings
Arduino:
Arduino DMX
Arduino sACN
JavaScript:
JavaScript node.js sACN example
JavaScript WebSerial DMX
This project is maintained by tigoe
Introduction to QLC+
QLC+ is a feee software package for controlling DMX-512 systems. You can connect it to your system via a number of different interfaces: USB-to-DMX adapters, DMX-to-Ethernet adapters, WiFi, Ethernet, and more. It’s useful as a diagnostic tool when you need to send DMX from your laptop without doing any programming. Though there are other more advance DMX controller apps on the market, QLC+ offers a simple interface to test with.
The notes here work with release 4.12.6.
After installing QLC+ and launching the application, you will see the window shown in Figure 1. Select Q Light Controller Plus.
Figure 1. QLC+ intro screen
Inputs / Outputs
QLC+ is able to accept a variety of different control inputs (such as Arduino-based lighting controllers) and then output a number of different lighting control protocols (DMX, ArtNet, Streaming-ACN, etc.) To set up an Input or Output, first select the “Inputs / Outputs” tab on the bottom bar of the window. Figure 2 shows the QLC+ inputs and outputs panel. These are all the interfaces that the program can use to talk to our DMX devices.
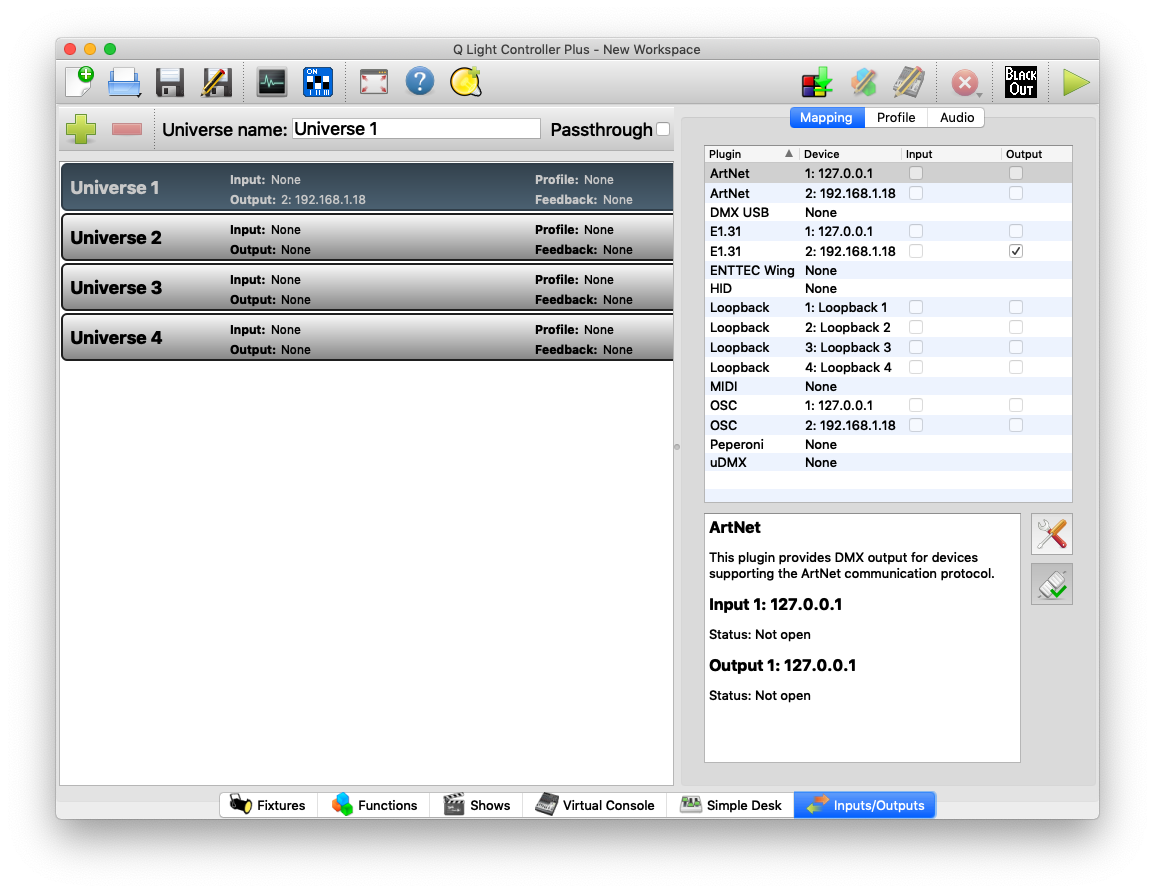
Figure 2. QLC+ Inputs/outputs panel.
Setting up a E1.31 (Streaming-ACN) Output
To create a Streaming ACN (also known sACN or as E1.31) output from the “Inputs / Outputs” panel, first click the Output radio button next to E1.31. Note that there are two E1.31 Plugins. One of them should list 127.0.0.1 (your computer’s localhost address) as the device. The other should list your computer’s IP on the local network (usually 192.168.X.XXX on a home network or 10.XX.XX.XX or 172.XX.XX.XX on an enterprise network such as NYU). Click the “Output” radio button on the second E1.31 option (the one on your local network).
Then, double click on this connection and you will be presented with a configuration screen which looks like this:
Figure 3 shows the configuration panel for one of the I/O interfaces, spefifically your WiFi interface.
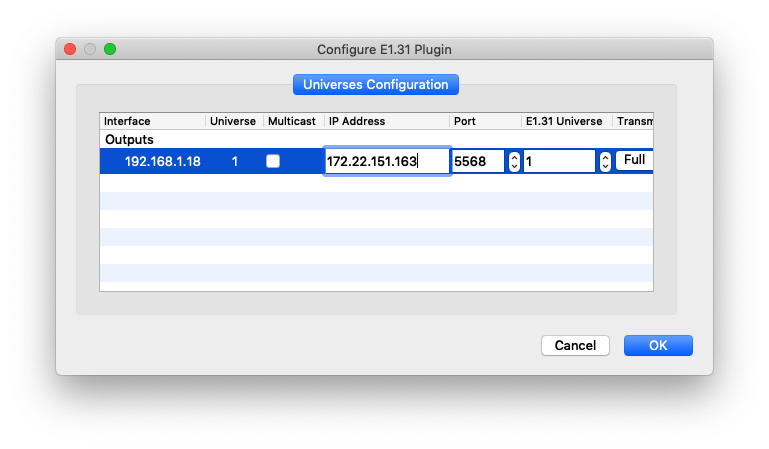
Figure 3. Configuring your WiFi interface for E1.31.
By default, sACN systems assume you’re operating over a dedicated subnet with no other devices other than your controller and the DMX devices you want to control. As a result, the default network setting is to send packets to the multicast address on the subnet, which is XX.XX.XX.255. If you’re sending sACN messages on a shared network, or worse, the internet at large, you definitely don’t want to multicast. Instead, send to a specific address. To connect to a specific output device accepting E1.31 as an input, uncheck the Multicast radio button and enter the IP address and port of your device.
Adding Lights
You can define your own lights in QLC+, or you can add light libraries defined by others. The Open Fixture Library contains fixture definitions for many different stage lights. To add them to QLC+, download them in QLC+ format from the site, then open the QLC+ user folder on your system (this link explains where to find it on different operating systems) and drop the fixture definitions in there. Then restart QLC+ and you’ll be able to add them by clicking the large green button on the main interface, then searching for the name of the fixture type that you added.
Controlling Lights
Finally, switch over to the “Simple Desk” tab at the bottom of the screen to use QLC+’s lighting board. This will now allow you to send lighting control to the Streaming-ACN output you specified in the “Inputs / Outputs” tab.
Figure 4 shows the simple light control desk.
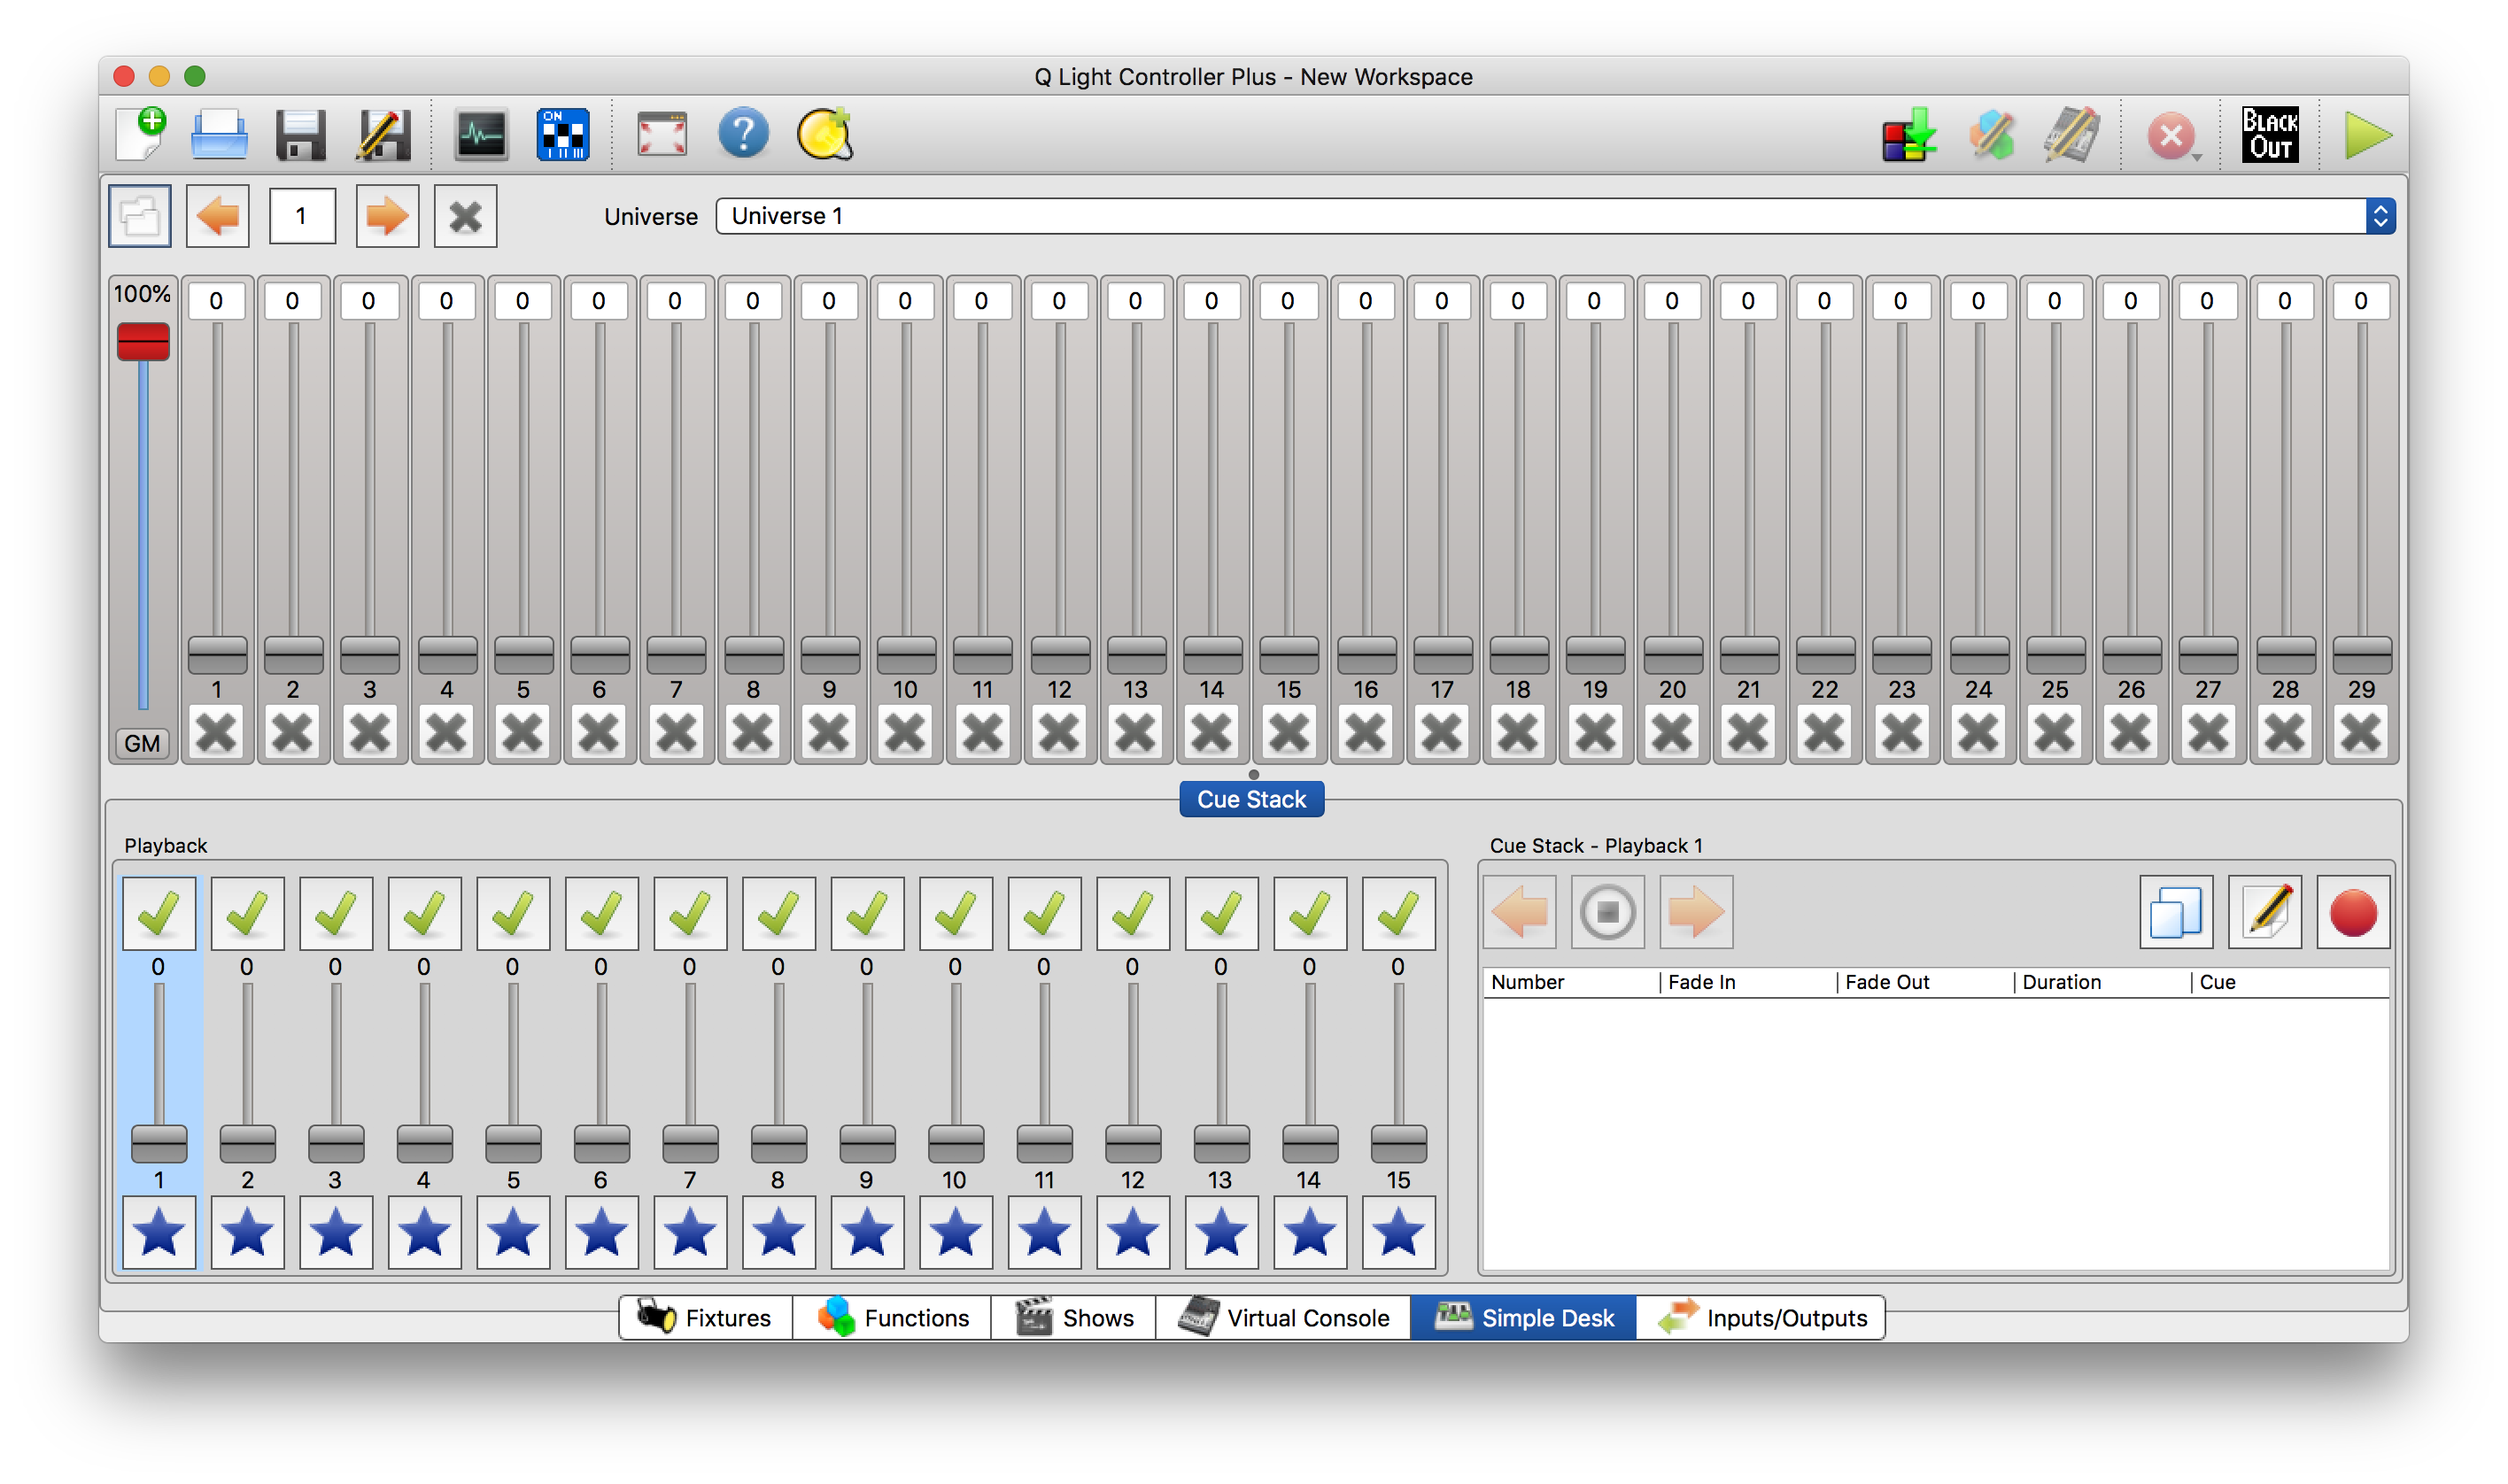
Figure 4. QLC+ Simple Light Control Desk